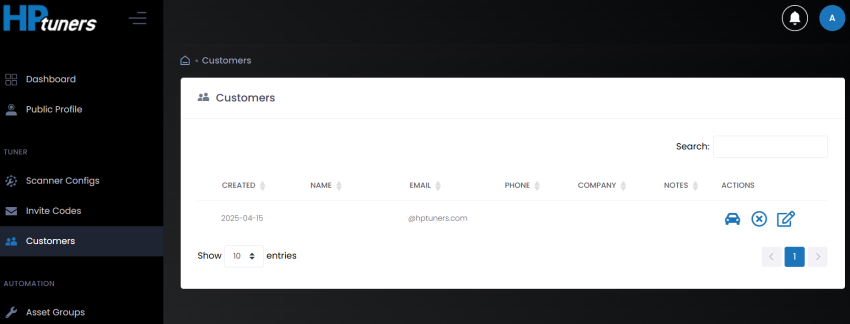
Once a customer has been accepted, that customer will be listed on the Customers page. Follow these steps to receive files from an accepted customer:
| 1. | Select Customers from the sidebar menu. The Customers page appears. |

| 2. | In the Actions column, click the |
HIDDEN ACTIONS: If your web browser window is not very wide, you may not see the icons in the Actions column. Instead, there will be a blue plus sign on the left end of the table. Select this icon to display the remaining options.

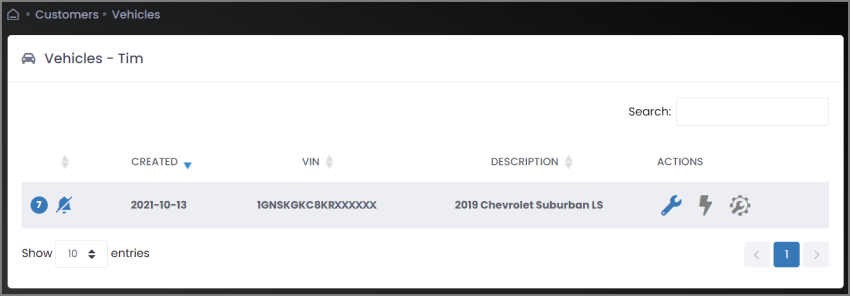
Each row of the table on the Vehicles page represents one user vehicle.
The icons in the ACTIONS column indicate the type of files available for each vehicle. (An icon is blue when files of that type are available.)
|
|
Tune Files (HPT extension): These files are added when the customer completes a read and sync. Customer tune files will have “Read-“ in the filename. |
|
|
Data Logs (HPL extension): These files are added when the customer uploads a log file using the TDN app. |
|
|
Scanner Config Files (XML extension): The icon will be blue if you have assigned a channel configuration file to this vehicle. Select it to view and modify that assignment. See Specifying Channel Configuration for Customer Scans. |
| 3. | Click on the icon for the type of file you wish to download. The list of files available for download appears. |
![]()
| 4. | Click the cloud icon next to the file you wish to download. |
HIDDEN ACTIONS: If your web browser window is not very wide, you may not see the icons in the Actions column. Instead, there will be a blue plus sign on the left end of the table. Select this icon to display the remaining options.

